The font files need to be in one of the following formats: .woff, .woff2, .ttf or .otf. If the font files are contained in a .zip file, you will need to unzip them first.
If your files are not in the correct format, or you want to change them to a more optimized format like .woff2, you can use Font Squirrel’s Web Font Generator.
Payment required for Personal and Commercial usage
Font licenses can also vary depending on the intended use. For example, some fonts are free to use on your website, but you can’t use them in a product you create to sell. If you are using free fonts it’s important to ensure the license matches your intended use.
Using the Fonts in WordPress
To use the fonts in WordPress, we need to install Fonts Plugin.
First, login to your wp-admin area, navigate to Plugins → Add New, search ‘Fonts Plugin’ and install the plugin.
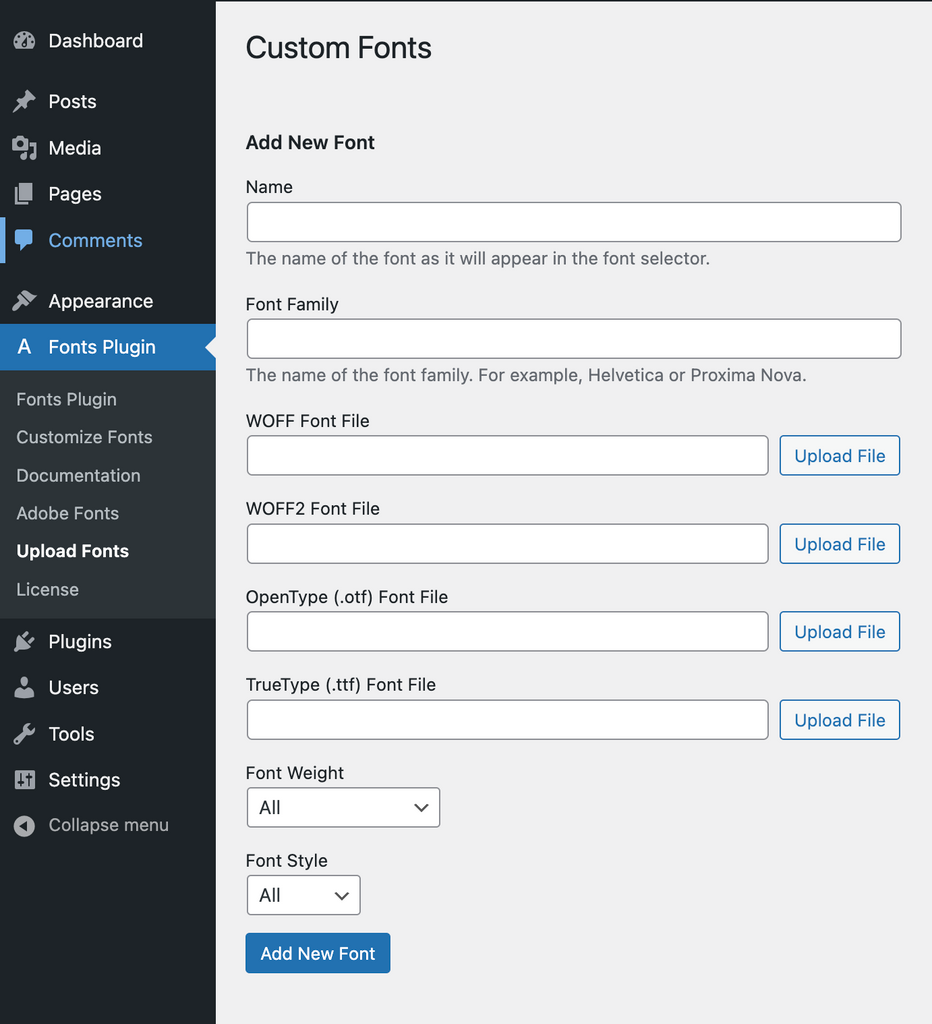
Next, click on Fonts Plugin →Upload Fonts in the admin sidebar.
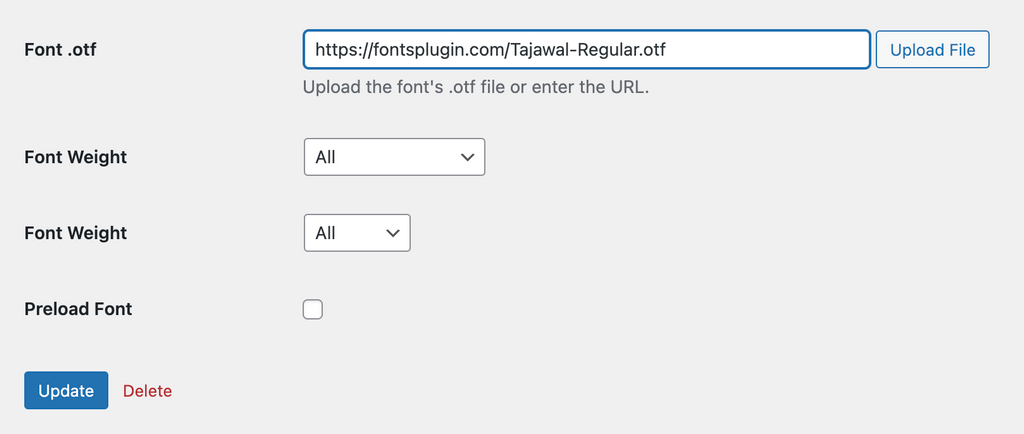
On the Upload Fonts screen you will be able to name and upload your font files.
For the font to display correctly you only need to upload one type of font file, we recommend the .woff2 format as it has the smallest file size.
If your font is split into multiple files, for example: OpenSans-Regular.woff2 and OpenSans-Bold.woff2 then you will need to enter a consistent Font Family value for each variant.
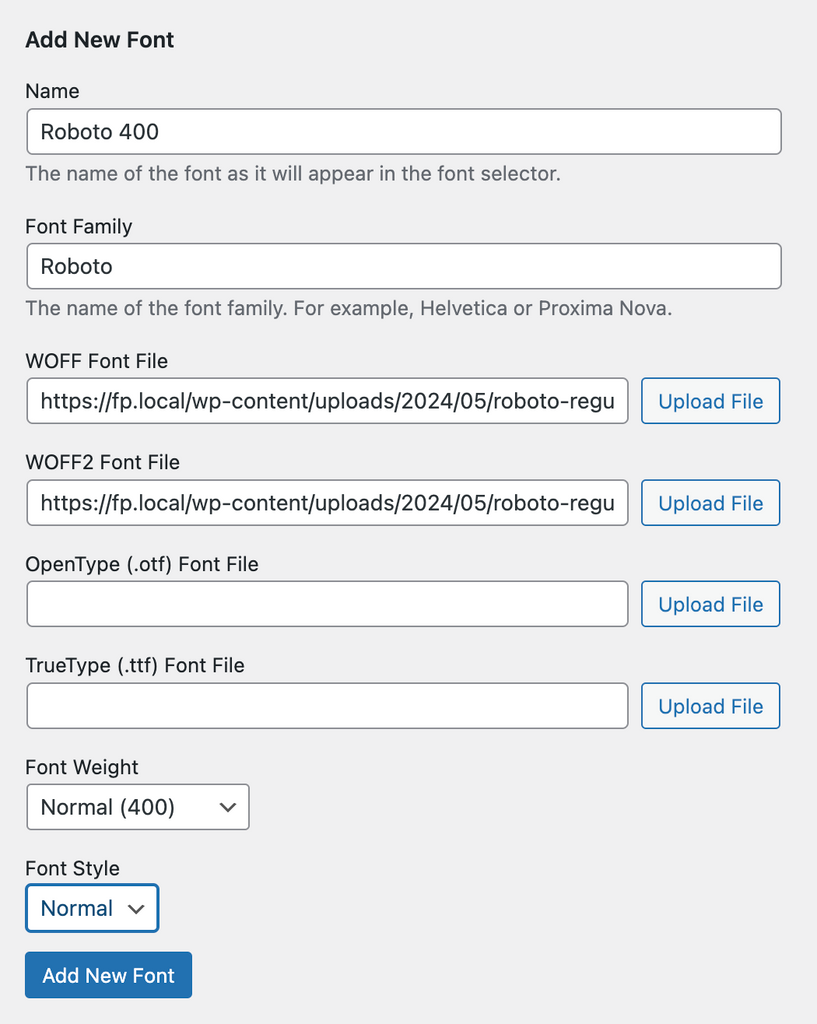
In this example we are adding the Regular variant of the Roboto font:
The name should be a unique value, so we can find the variant later if needed. So we have named it Roboto 400 for simplicity.
If the font you are adding only has one file, you don’t need to enter a Font Family value.
Once you have pressed the ‘Add New Font’ button, your font is now ready to use. It can be used in the Customizer, Block Editor (Gutenberg) or the Classic Editor
Customizer
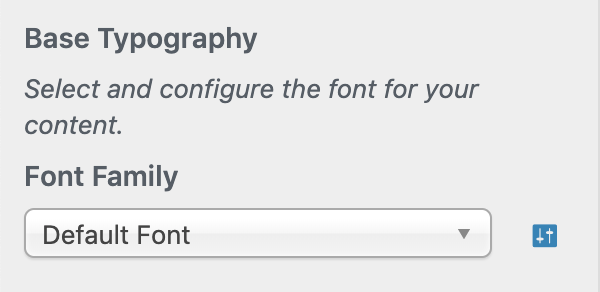
The Customizer is used to configure the typography of your entire website at once.
From within wp-admin, navigate to Fonts Plugin → Customize Fonts → Basic Settings
Choose your font from the dropdown list and the change will be reflected instantly. You can also change the typography of specific elements by exploring the ‘Advanced Settings’.
Clicking the blue icon to the right of the ‘Font Family’ control will reveal additional typography controls
Block Editor
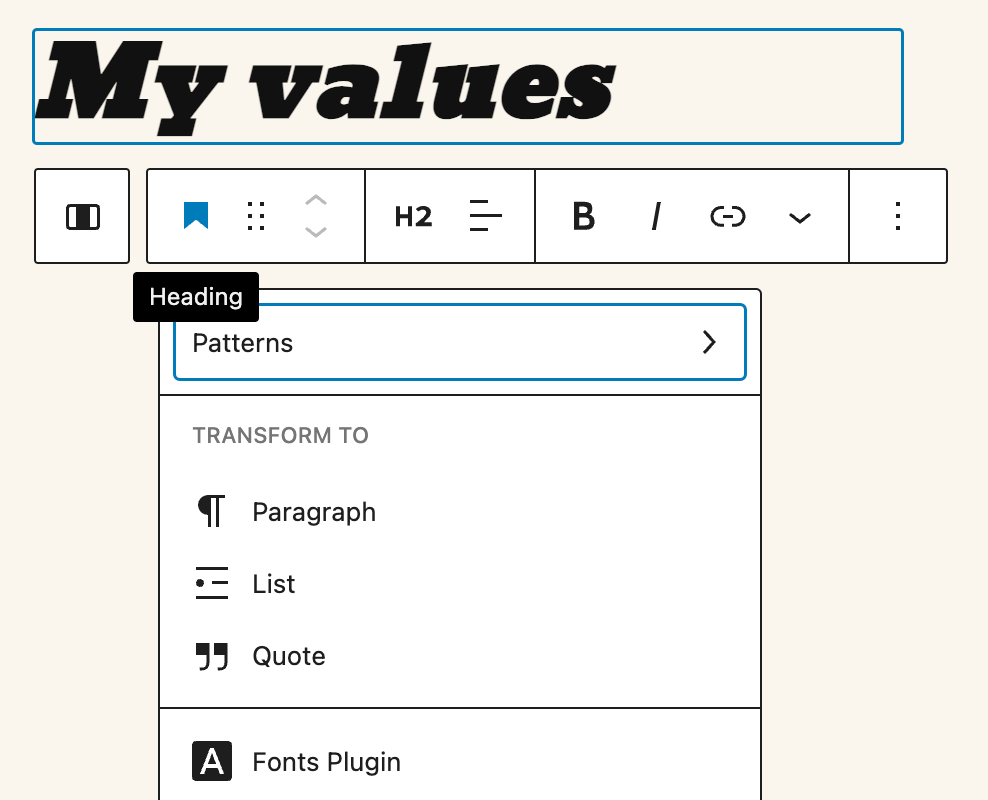
To use your new font on a single paragraph or heading in the block editor, first create your content.
Next, while focusing on the block, click the first icon (Transform). The editor will reveal a list of possible transformations. Choose ‘Fonts Plugin’.
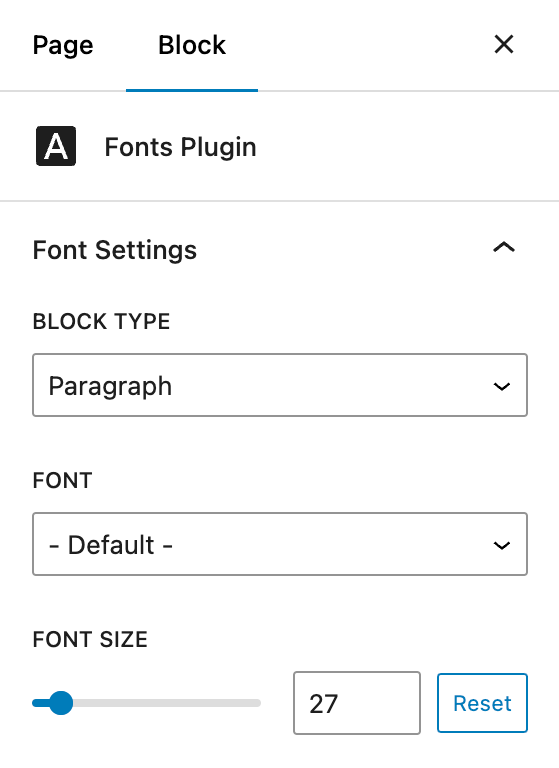
Initially your content will look the same. However, you will now have access to the ‘Fonts Plugin’ sidebar where you can choose your new font:
Click ‘Fonts Plugin’ to transform the block.
Classic Editor
To use your new font in the classic editor, first create your content.
Next, highlight your content and click the Font Family dropdown. Your new font should be near the top of the list.
How to Optimize Custom Fonts
When fully optimized, uploaded fonts don’t add a large amount of weight to your page (30-50kb per variant) and shouldn’t noticeably slow down your website. Here are the best ways to do that:
1. Limit the Font Variants
There are 18 possible variants, as seen in the table below. Not all fonts support all 18, but if they do, it doesn’t necessarily mean you need to upload them all.
Thin (100)
Thin Italic
Extra Light (200)
Extra Light Italic
Light (300)
Light Italic
Normal (400)
Normal Italic
Medium (500)
Medium Italic
Semi Bold (600)
Semi Bold Italic
Bold (700)
Bold Italic
Extra Bold (800)
Extra Bold Italic
Black (900)
Black Italic
Only upload the variants that are used in your design and content. In many cases this may only be four: Normal, Normal Italic, Bold and Bold italic.
2. Preload the Fonts
Preloading is an optimization technique supported by all the major web browsers. It’s a line of code on your website that signals to the browser that your website uses a custom font and it needs to be download immediately to reduce the chance of a FOUT (Flash of Unstyled Text).
Preloading is a Fonts Plugin Pro feature and is automatically enabled for custom font uploads in the .woff and .woff2 formats. However you can also disable preloading for individual variants by unchecking the feature
3. Use Optimized Formats
The format of the font files can have a huge effect on the font size. Here is a comparison of Roboto (regular) in different formats:
TTF – 168kb
WOFF – 26kb
WOFF2 – 19kb
All modern browsers support both WOFF and WOFF2 format, so we highly recommend using those. If your fonts are not already in either of those formats, you can use the Web Font Generator to convert them.
4. Local Hosting
Local hosting is when the font files are hosted and served from your own domain, and is the most efficient way to add fonts to your website. Using Fonts Plugin to add fonts to your website ensures your fonts are locally hosted automatically.
How To Speed Up WordPress (A Non-Technical Guide)
You hate slow websites, your visitors do too.
Studies have shown that 47% of users expect pages to load in two seconds or less. Also, they found that 40% of users will abandon a website completely if it’s taking 3 seconds or more.
It’s not just users, Google also uses page speed as a ranking factor when deciding which order to place websites in the search results. Slower pages equate to worse rankings.
Run two tests, one on your homepage and another on an inner page. I recommend two tests because the homepage is usually the most complex page on any website and not a good representation of the website as a whole.
For media-heavy pages which feature a lot of images or video, your target should be 2 seconds and below. For pages that are mostly text (like this one) you should be looking for closer to 1 second.
If you are falling short of those targets then the information below is going to be very valuable to you. On the other hand if you already have a fast website you might still benefit from the information – a study for Walmart found that for every 100 ms of improvement, they grew incremental revenue by up to 1%.
Source: orangevalley.nl
A Different Approach
Most lists on “how to speed up your website” are effectively a collection of twenty-plus best practices thrown together with no consideration given to a) the work required to implement the recommendations, or b) the impact of each recommendation.
The problem is that without any context on the amount of effort required and the potential impact you can’t make an education decision on which recommendations to prioritize. You could spend hours implementing a recommendation that increases speed by 1% while ignoring another that could have been done in less time and have a much larger impact.
That’s why I’ve taken a different approach in this guide. Recommendations are first organised by impact, then difficulty.
High and Medium Impact recommendations will give the biggest bang for your buck and that’s where you should start. Only once those recommendations have been explored should you consider the Low Impact items.
A Helping Hand
There are two premium plugins which you can use to automatically implement 80% of the recommendations, potentially saving you hours of work. They are not strictly required to implement any of the below, but they will save you a lot of time compared to the modest cost.
1. WPRocket is a caching plugin, but unlike most of it’s competitors it doesn’t require a ton of set up and configuration to reap the benefits. In fact WP Rocket reports that you will get 80% of the optimization just by enabling the plugin, without any configuration.
WP Rocket is the only cache plugin which integrates more than 80% of web performance best practices even without any options activated.
2. Perfmatters is a lightweight performance plugin that enables you to implement 20+ performance optimizations in just a couple of clicks. As you will discover in this guide, it’s possible to achieve the same outcome by piecing together free plugins. But for a low cost ($25) you can have one plugin handle everything, and have the peace of mind that the plugin is backed by an experienced development team with a focus on optimization.
How To Speed Up WordPress
I’ve grouped the recommendations by impact (high, medium, low and none) and then ordered each group by difficulty. As you will see there are only a few things you can do that will have a high impact and most of them are difficult to implement. While that may not be encouraging to hear, it does reflect the honest reality of website performance which many other guides choose to omit.
Keeping your PHP version up to date is important for security and the smooth operation of your website. It also brings substantial performance improvements – roughly speaking PHP 7 is twice as fast as its predecessor PHP 5.6. That doesn’t mean your website will be twice as fast if you upgrade from PHP 5.6 to 7 as there are other factors at play, but it should make a considerable difference.
Requests per Second (higher is better) source: kinsta.com/blog/php-benchmarks/
One thing to be wary of is that PHP upgrades can include “breaking changes”, which means that if your theme or plugins contain code that hasn’t been tested with the latest versions it can cause problems.
Don’t let that dissuade you from upgrading to a modern version of PHP, the security and performance benefits are too great. Instead, research what options your host offers to mitigate the risk. Nowadays most hosts offer staging environments which allow you to test any changes safely. Also, since version 5.2 WordPress has also included Fatal Error Protection to reduce the risk of code errors bringing down your site.
Use High-Performance Hosting
Your choice of host will have a bigger impact on your site speed than 90% of items on this list.
If your hosting server takes an extra second longer to load your page than an alternative would, then there is no way you can overcome that with any of the recommendations below.
Unfortunately it’s also one of the hardest things to change. Many people are technically or contractually tied to their existing host. Some hosts (including Kinsta) offer a free migration service to help ease the technical difficulty of changing hosts.
In hosting you get what you pay for. Managed hosts (Kinsta, WPEngine, Pantheon) are more expensive but usually faster than the low-cost shared hosts (Siteground, Bluehost, Hostgator). I personally recommend Kinsta and Siteground to all my clients as in my experience they are the best in their respective price points, both in performance and support.
A third-party script is one which connects to an external website or service and then executes code on your website. Google Adsense is a popular example.
The problem with third-party scripts is that your page speed is at the mercy of the provider. If they are taking three seconds to complete the request then your page will take three seconds longer to load.
There are ways to reduce the impact that third-party scripts have on your website. However, many third-parties, especially advertising networks, are very explicit in how they want you to implement their code. They tell you exactly where it must be placed and which code should load before or after it, which severely limits the steps you can take to reduce the performance impact.
Rather than trying to optimize the scripts, it’s more productive to check if you need them at all. It’s not uncommon to have lingering scripts that you are not using but haven’t removed yet. Common examples include:
Tracking Scripts
Advertising Scripts
Social Network Embeds
At the start of this guide I told you to test your using perform a speed test, if you scroll down on the results page you will see a table detailing all the requests your page made. You can order the table by Load Time (descending) to see which requests are taking the longest. By identifying which requests are taking the longest you can audit whether they are required at all. If they are then speak to the provider to see if there is any way to optimize the delivery.
Audit Your Plugins
Most WordPress plugins are not built with performance in mind. Instead they are built and marketed around adding features and functionality to your website. Performance is a secondary consideration at best.
This means that for maximum performance you need to carefully audit each plugin you add to your website and assess the impact it is having.
Does the frontend seem slower when it’s activated?
Does wp-admin seem slower when it’s activated?
Unfortunately in WordPress there isn’t an easy way to see which plugins are slowing your site down. There are tools than can help but they are most for professional users, Debug Bar and New Relic are two examples.
A non-technical way to assess the impact of each plugin is to disable all plugins, perform a speed test and then re-activate them one at a time, making a note of the performance each time.
Medium Impact
Implement Static Caching
There are two main types of caching: browser caching and static caching.
Browser caching is mostly handled by the browser and fairly optimized, so we worry about that for now.
Static caching on the other hand can result in huge performance gains when implemented properly. That’s what we will be focusing on.
Some background: WordPress builds your pages from a combination of template files (header, footer, etc.) and content from the database (post content, menus, comments, widgets, and so on). This process is called “dynamically generating” the page and is repeated for each pageview. On the server level it’s an expensive process, that’s why when you ask the server to do it hundreds of times at once (a traffic spike) your website can crash.
A more optimized solution is to build the page once, store it in an efficient format (static HTML) and then serve that file to every visitor, instead of dynamically generating the page each time. On a basic level that’s an explanation of what static caching is.
Static caching has two benefits. The first is that it makes your pages quicker to load as there is less work for the server to do. The second benefit is that because the server isn’t working as hard it can serve more visitors at once. That means with static caching your website is both faster and better equipped to handle high traffic events.
Adding a static cache to your website is as simple as enabling a plugin. I recommend either Cache Enabler (free) or WP Rocket (Premium). Some hosts also offer their own solutions – Siteground has a plugin and Kinsta features a built-in caching-system.
Use a CDN (Content Delivery Network)
Like caching, CDNs can cause confusion because there are different solutions using the same name. One feature all CDNs share is that they have servers scattered across the globe which they can distribute your content from. In comparison your website is likely hosted on one server in one place (example: San Francisco, USA).
The Cloudflare network spans over 200 cities in more than 100 countries.
Proximity matters when measuring page speed, if a user is located in Europe but your server is in the USA, then it will take longer to load that page than if the same user was in the USA (all else being equal).
Traditional CDNs make a copy of your static files (images, CSS and Javascript) and place them on their distributed servers. You then configure your website to serve the files from the CDN instead of your server, most of this is done automatically by plugins. KeyCDN and Jetpack Site Accelerator are examples of traditional CDNs.
Reverse Proxy CDNs offer much more than just the hosting of your static files. They also provide security by acting as a guard between your website and potential attackers. By checking traffic before it hits your server they are able to eliminate a lot of bot and malicious traffic. Cloudflare is the most well-known example of a reverse proxy CDN.
Cloudflare’s 51 Tbps network blocks an average of 72 billion threats per day, including some of the largest DDoS attacks in history.
Unless your host has a CDN built-in (like Kinsta does) then your best bet is to use Cloudflare. It’s completely free and the set up is fairly simple. You just need access to your domain registrar account to change the nameservers.
Optimize Images
Images imported from cameras, mobile phones and stock photography websites are often super high quality and multiple MBs in size, which is big in website terms. However, in most cases they can be compressed to less than 30% of their original size without any noticeable loss in quality.
There are two ways to optimize your images. The first option is to use an online tool such as tinypng.com to optimize images individually before you upload them to WordPress. The second option is to use an image optimization service which performs the optimization automatically whenever you upload an image to WordPress.
An added benefit of the second approach is that you can also optimize all your pre-existing images with the click of a button. If you are going to go down this route I suggest looking into ShortPixel. They are free for up to 100 images per month and their paid plans start at just $5/month for 5000 images.
Lazy Load Images
Images are usually the heaviest elements (in KBs) on a page. Especially if you use a lot of them. Lazy loading is the process of not loading images until they are on or near the visible part of the screen.
Lazy loading images is as simple as installing a plugin, or if you are using either WP Rocket or Perfmatters plugin it’s the flip of a switch as both plugins include the functionality.
Optimize Font Performance
Fonts are an example of a third-party request, a topic we’ve already explored. However, they are a particularly big request, especially when used incorrectly, and require a different method of optimization. So I’m covering them separately.
Most web pages have at least 10+ HTTP requests comprising of three main types: CSS, Javascript and images.
In the past it was the case that the browser could only process a limited amount of requests at once and the rest would wait in a queue. This limitation meant that the number of requests was causing a bottleneck, not just the size of each request.
Request size does directly affect load time but combining HTTP requests isn’t related to that so we won’t be exploring it here.
This led to an optimization technique called “combining requests”, where you would combine all of the .css/.js files into one (bigger) .css/.js file and reference that in the code instead. Additionally, the combining process could be easily automated using a plugin.
Nowadays most websites and servers support a protocol called HTTP/2 which doesn’t limit simultaneous requests and can instead process them all at once. This mostly negates the need for combining requests. A better solution is to work on removing unnecessary requests entirely and minimizing the size of the remaining requests.
Low Impact
Enable GZIP Compression
GZIP is an effective form of compression that happens on the server-level. 50%+ reductions in size are not uncommon when enabling GZIP. The great news is that most hosts enable GZIP by default. Even if you are on cheaper shared hosting, there are usually simple ways to enable GZIP compression, ask your host about this.
Minify Assets
HTML, CSS and Javascript files use blank spaces and comments in the source code to improve readability for developers. Basic minification simply removes these extraneous elements to reduce the file size. As a general guide you can expect between a 10-50% reduction in file size. But unlike images, these files are not usually big to begin with, so the improvement is not as pronounced.
WP Rocket supports HTML, CSS and Javascript minification.
Clean The Database
Some plugins interact with the database at all, but many do. Generally speaking, the more complex a plugin is, the more interaction it has with the database. WooCommerce for example stores a lot of information in the database and has its own table.
The more data that is stored in a database the bigger it becomes in size. The bigger the database is, the longer each interaction (query) with it takes. Large databases and complex queries can easily add multiple seconds to your page load time.
As your website grows and there is more data to store it’s inevitable that the database will grow, but what we don’t want to do is fill it with unused, unnecessary or expired data.
Here are some examples of data that can increase the database size without providing any benefit:
Spam Comments
Old Post Revisions
Plugin Logs
The best plugin I’ve found for cleaning your database is Advanced DB Cleaner (free). It allows you to perform the basic cleaning tasks in a click and also explains each option so you can understand what is happening under the hood.
Another useful feature is that the plugin displays the size of each database table so you can see if any are spiralling out of control.
Remove Query Strings
Browsers cache CSS and Javascript files as its quicker to load them from the local cache than it is to retrieve them from an external server each time.
The problem is that if the original file on the server changes there is no way for the browser to know and it will keep using the out of date version from the cache (until the cache is cleared or expires).
Query Strings solve this problem by appending a version number to the end of the file, like this:
style.css?ver=2.2.1
When the code updates, the version number increments and the browser knows that using the version from the cache will no longer be valid.
This creates a new problem. Some CDNs are unable to cache files with query strings – thats why most speed test tools recommend you remove them.
Removing query strings from static resources is as simple as installing a plugin, or if you are using the Perfmatters plugin it’s the flip of a switch.
Disable Embeds
WordPress includes a small script on each page that automatically embeds supported content when you paste a link to it. An example of this would be Tweets or Facebook posts. The script is named wp-embed.min.js and while it’s small, if your website doesn’t utilize embeds then there is no need for the extra HTTP request.
Disabling embeds is as simple as installing a plugin, or if you are using the Perfmatters plugin it’s the flip of a switch.
Disable Emoji
WordPress includes a small script on each page that increases the compatability of emoji. The script is wp-emoji-release.min.js and while it’s small it’s still unnecessary for most websites as they don’t use emoji.
Disabling emoji is as simple as installing a plugin, or if you are using the Perfmatters plugin it’s the flip of a switch.
Host Gravatars Locally
Gravatar is the service that WordPress uses to display personalized author and commentator avatars. Without Gravatar avatars would be impersonal place holders.
Gravatars are implemented in an optimized way by default, the images themselves are compressed and they use DNS prefetching.
Gravatar can add a lot of external HTTP requests to your page. For example if your page has 100 comments then that is 100 requests to the Gravatar API to retrieve them.
Ultimately it is up to you to decide wether it’s worth the performance cost to show user avatars instead of placeholders. To disable Gravatars you can use a plugin, or to potentially achieve the best of both worlds you can lazy load the avatars using the Perfmatters plugin.
Disable or Limit Post Revisions
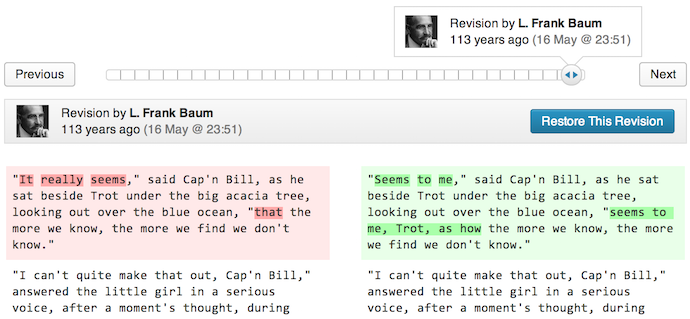
Post revisions are an excellent feature of WordPress. Each time you update a post or page, the previous version is saved as a backup. By default there is no limit to the number of saved revisions a post can have.
It’s not unusual for a post to have 10+ revisions. Now imagine if you had 200 posts, that’s 2000+ revisions in the database. Post Revisions aren’t free, they come at the cost of increased database size, which can ultimately slow down your website.
A better solution is to place a sane limit on revisions, 3 is a good starting point. WordPress will then only keep the 3 most recent revisions and automatically delete older ones.
To limit Post Revisions you can use a plugin, or use the Perfmatters plugin.
Delete Old Post Revisions
When you lower the limit on post revisions, WordPress won’t automatically remove the existing revisions that exceed this limit. Instead you will need to use the tools I shared in the Clean The Database section to remove those.
This site has accumulated 12,000 post revisions.
Use Resource Hints (Prefetch)
HTTP requests are broken up into different stages. The first stage is for the browser to figure out where to retrieve the data from so it can connect to the external server, that’s called a DNS Lookup.
DNS Lookups are performed when the browser is ready to start the HTTP request. As we can see from waterfall graphs browsers don’t load everything at once, instead they load different parts sequentially.
Modern browsers support an optimization called ‘DNS Prefetching’ where instead of performing the lookup as the requests starts, you can preemptively perform all the Lookups as soon as the page begins to load. Initiating them right away (and all at once) means the browser doesn’t have to wait when it reaches that part of the process.
DNS Lookups don’t take a long time, usually between 0 and 100ms, so this optimization won’t have a massive effect, but it has no downsides so it’s worthwhile to do.
Some examples of resources you can prefetch:
Tracking & Analytics
Custom Fonts
Advertisements
Gravatars
CDNs
Ideally the plugins responsible for the items above should handle the resource hints for you. In Fonts Plugin we add a DNS-Preconnect for fonts.gstatic.com and WordPress adds a DNS-Prefetch for gravatar.com. It is possible to implement your own resource hints using Perfmatters, but it’s highly-technical so I would avoid doing that unless strictly necessary.
DNS Lookups can be cached. If the browsers has already connected to a resource, Google Analytics for example, then a DNS Lookup will not be required next time the browser connects to the same resource, even on different websites.
Audit Your WordPress Theme
WordPress themes generally focus on the appearance of a website whereas plugins focus on functionality. As such there isn’t as much scope for damaging website performance. Although there are two exceptions:
1. Badly written themes
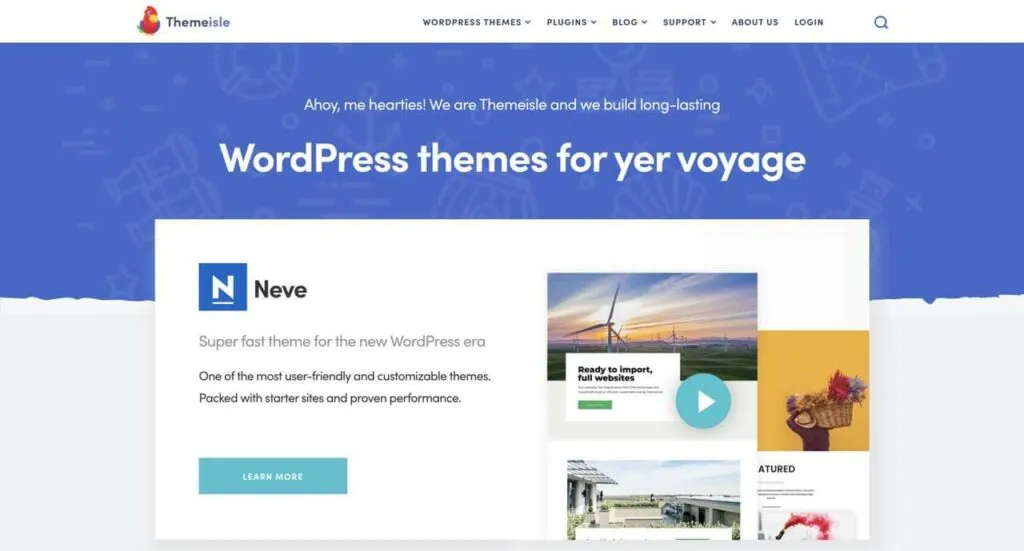
It’s hard to know if a theme is “badly written” without a full code review. Choosing themes from the wordpress.org/themes directory is a smart move as they have high standards for inclusion. Well-established theme providers like ThemeIsle, WPZoom and ThemeKingdom can also be relied on.
2. Themes that include a lot of Javascript
Interactive features like sliders, loading screens and scrolling effects are built using Javascript. While there is nothing inherently bad about JS, when implemented carelessly it can be heavily detrimental to your page speed.
If you think your theme might be problematic, temporarily enable one of the default themes and see if your page speed improves. The default themes are very minimalist in code and features so provide a good baseline.
Little or No Impact
Update WordPress
While it’s a good practice to keep WordPress up to date, there are not usually significant performance improvements between releases.
XML-RPC is a mechanism that facilitates the connection between applications and WordPress. Mobile writing apps that can publish directly to your website are an example of a tool that uses this connection.
In more recent times the WordPress REST API has been favored for this use-case. However the XML-RPC protocol still exists for legacy reasons.
There is nothing inherently wrong with XML-RPC from a performance or security standpoint. However, it does leave the door open to potential DDOS attacks. If you are not using any tools or services that require it then it makes sense to disable it.
Disabling XML-RPC is as simple as installing a plugin, or if you are using the Perfmatters plugin it’s the flip of a switch. Some hosts (like Kinsta) also disable XML-RPC by default.
Note: The Jetpack plugin uses XML-RPC so you may need to keep it enabled if you are using that plugin.
Remove WordPress Version Meta Tag
In the source code of your website WordPress outputs a line of code denoting the version you are using, it looks like this:
Some people consider this a security risk, as it makes it very easy for malicious users to identify websites running insecure version of WordPress, so you might want to remove the tag on that basis. But removing it won’t have any positive effect on page speed.
Remove wlwmanifest link
The wlwmanifest link is a meta tag that tells the Windows Live Writer software how to interact with WordPress. It looks like this:
Removing it will not improve performance but if you want to do it anyway it’s super easy using a plugin or Perfmatters.
Remove WordPress Shortlink
By default WordPress creates a shortlink for every page on your website which redirects to the full URL. For example this page is https://fontsplugin.com/speed-up-wordpress but you could also use https://fontsplugin.com/?p=9586 to access it instead.
WordPress references the shortlink in the source code of your website like this:
Removing the shortlink reference from the source code of your website will not improve performance but if you want to do it anyway it’s super easy using a plugin or Perfmatters.
Disable RSS feed
Every WordPress website has a built-in RSS feed at /feed, ours is https://fontsplugin.com/feed
RSS Feeds can be used by readers to effectively subscribe to your website using a ‘Feed Reader’. They can also be used by software that needs to retrieve a simplified version of your content. For example tools that repost your content to Facebook.
Disabling your websites RSS feed will not improve performance and it might exclude some readers. But if you want to disable it anyway it’s easy to do using a plugin or Perfmatters.
Conclusion
At the start of this guide I set you some load time targets: one second (or less) for text-based pages and two seconds for media-heavy pages. If you focus on implementing the recommendations in this guide I’m confident that you will have no problem reaching those numbers.
If you’ve found this guide useful please like it on Facebook or Twitter so more people can discover it too.
This post contains affiliate links. When you buy through links on our site, we may earn an affiliate commission. This does not affect our recommendations in any way. We only recommend products we use and love.
How to Remove Google Fonts from WordPress (for GDPR / DSGVO)
Google Fonts can be a great addition to your website that considerably improves your typography. However, they do add an external dependancy to your website and can increase page load times.
In many cases, WordPress themes and plugins may have built-in code that automatically loads Google Fonts, even if you don’t want or need them.
In this article we are going to look at how to completely remove Google Fonts from your websites.
Check Your Website
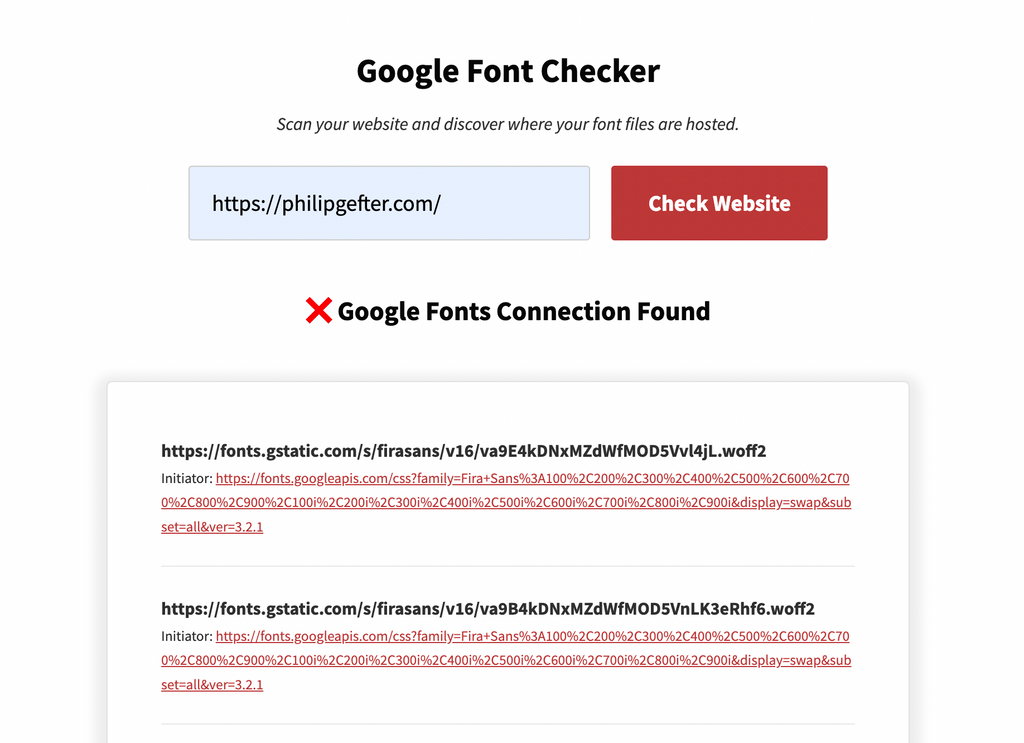
First, you will want to confirm that your website is loading fonts from Google, you can do that by entering your site into the Google Fonts Checker:
As you can see, there are multiple requests to Google-owned domains.
fonts.googleapis.com refers to the CSS stylesheets. fonts.gstatic.com refers to the font files.
Once you have implemented the steps in this article, you can run the test again to check that there are no requests.
Fonts Plugin Pro
Our premium plugin plugin Fonts Plugin Pro allows you to remove all Google Font references with a click of a button.
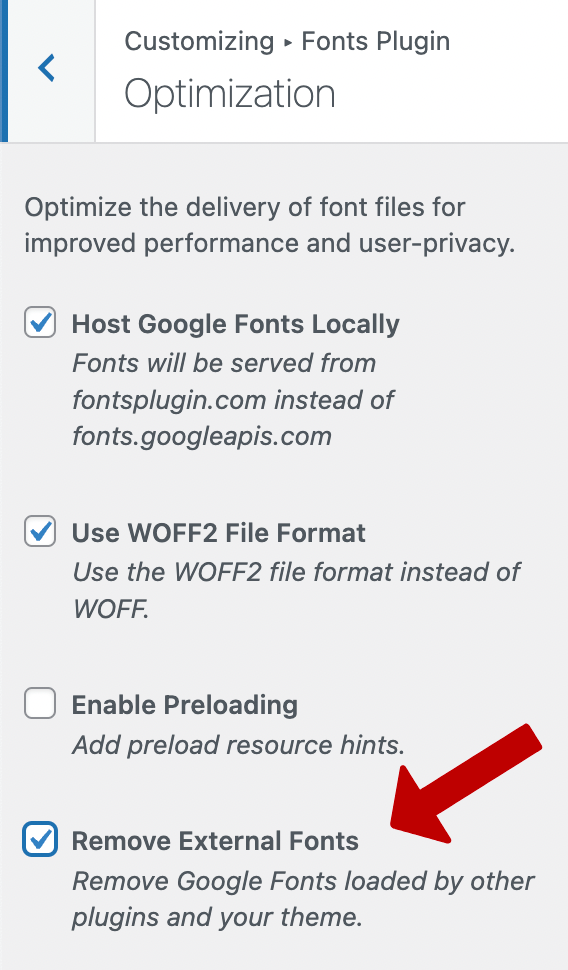
To remove Google Fonts with Fonts Plugin Pro, navigate to wp-admin → Customize → Fonts Plugin → Optimization.
Enable the ‘Removal External Fonts’ checkbox and press ‘Publish’ to save your changes.
Host Google Fonts Locally
In many cases, the fonts are integral to the design of your website and you won’t want to remove them entirely. Fonts Plugin Pro allows you to keep your fonts but remove the references to the Google API.
This is achieved by hosting the font files on your own server, and again this can be achieved with just a couple of clicks using Fonts Plugin Pro.
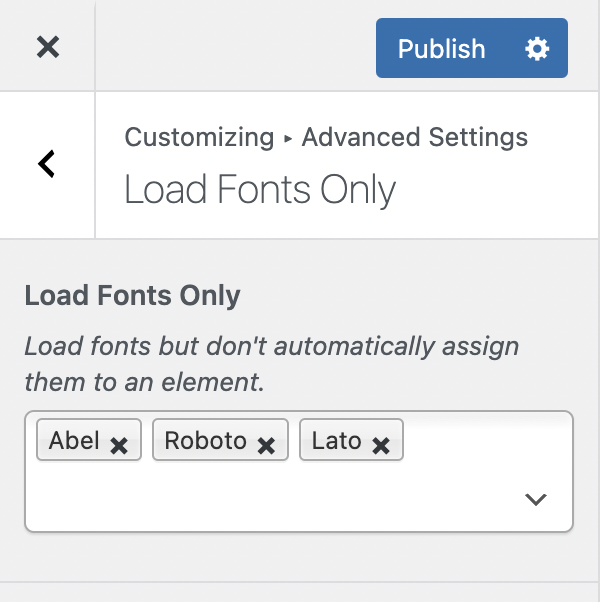
First, enable both the ‘Host Google Fonts Locally’ and the ‘Removal External Fonts’ settings.
Next, navigate to wp-admin → Customize → Fonts Plugin → Advanced Settings → Load Fonts Only and add the fonts that you want to host locally.
Press ‘Publish’ to save your changes.
⭐️ Using a Free Plugin
If you are looking to simply remove all traces of Google Fonts from your website, then there is a plugin to do that:
Simply activate the plugin and it will remove all requests to Google Fonts. There are no configurations or settings pages.
The text on your website will still display even if Google Fonts aren’t present. Browsers are smart enough to fallback to system fonts.
Remove Google Fonts from YouTube Video Embeds
YouTube videos are a third-party resource, which means that when they are added to your website it’s not possible to control the output they generate. YouTube is styled using the Roboto font, so by extension your website will show a request to the google fonts API (fonts.gstatic.com).
It’s not possible to remove the font request without removing the YouTube video. If the video is integral to your website, and you don’t want to remove it, then you might consider an alternative video platform such as Vimeo or even self-hosting the video.
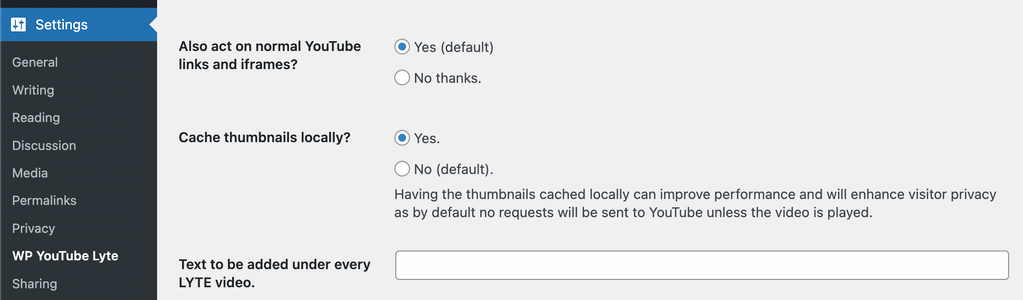
Another fantastic option is the WP YouTube Lyte plugin. When configured correctly, it automatically replaces embedded YouTube videos with a static thumbnail image which is hosted on your domain. Only once the user has clicked play on the video will a connection to YouTube be initialized.
Remove Google Fonts from Google Maps
Google Maps are a third-party resource, which means that when they are added to your website it’s not possible to control the output they generate. Google Maps are styled using the Roboto font, so by extension your website will show a request to the google fonts API (fonts.gstatic.com).
It’s not possible to remove the font request without removing the Map. If the map is integral to your website, and you don’t want to remove it, then you might consider replacing it with a static image instead. Or you could use an alternative service like Open Street Maps.
ReCaptcha is an anti-spam technology commonly used in conjunction with WordPress contact form plugins. ReCaptcha is a third-party resource, which means that when it’s added to your website it’s not possible to control its output. ReCaptcha is styled using the Roboto font, so by extension your website will show a request to the google fonts API (fonts.gstatic.com).
It’s not possible to remove the font request without removing the ReCaptcha service. However, there are alternative anti-spam tools that don’t require connecting to a third-party. For example, WP Armour:
Elementor doesn’t have built in controls to remove the Google Fonts it loads. However, we have performed tests and can confirm the Disable & Remove Google Fonts plugin successfully removes all font references from the Elementor and Elementor Pro plugin.
Remove Google Fonts from WPBakery (Visual Composer)
WPBakery doesn’t have built in controls to remove the Google Fonts it loads. However, we have performed tests and can confirm the Disable & Remove Google Fonts plugin successfully removes all font references from the WPBakery plugin.
Remove Google Fonts from Slider Revolution
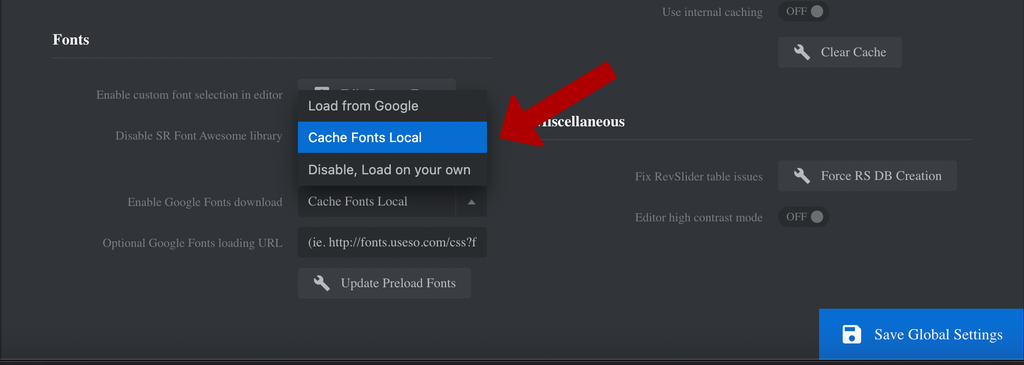
Slider Revolution has built-in controls to host the fonts it loads locally, or remove them entirely. Navigate to wp-admin → Revolution Slider → Overview.
Click ‘Global’ and then under the ‘Fonts’ section, change the ‘Enable Google Fonts download’ setting to either ‘Cache Fonts Local’ or ‘Disable, Load on your own.
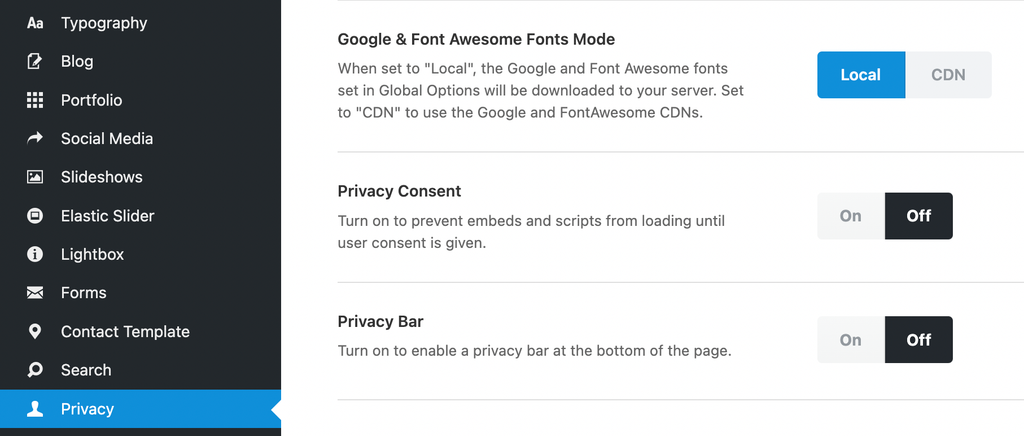
Disable Google Fonts in the Avada Theme
Avada Privacy Settings
Avada has built in controls to host fonts locally, but it doesn’t have a control to remove the Google Fonts completely. However, we have performed tests and can confirm the Disable & Remove Google Fonts plugin successfully removes all font references from the Avada.
Note: The Disable & Remove Google Fonts plugin will not remove fonts in Avada if the ‘local’ setting is enabled.
Disable Google Fonts in the JupiterX Theme
The JupiterX Theme by artbees uses a unique method of adding Google Fonts, so the above methods won’t work to disable the fonts. Instead you will need to do the following:
Navigate to your wp-admin area
Hover the ‘Jupiter X’ tab
Click the ‘Settings’ link
Change the ‘Google & Adobe Fonts’ dropdown to ‘Disable’
Click ‘Save Settings’
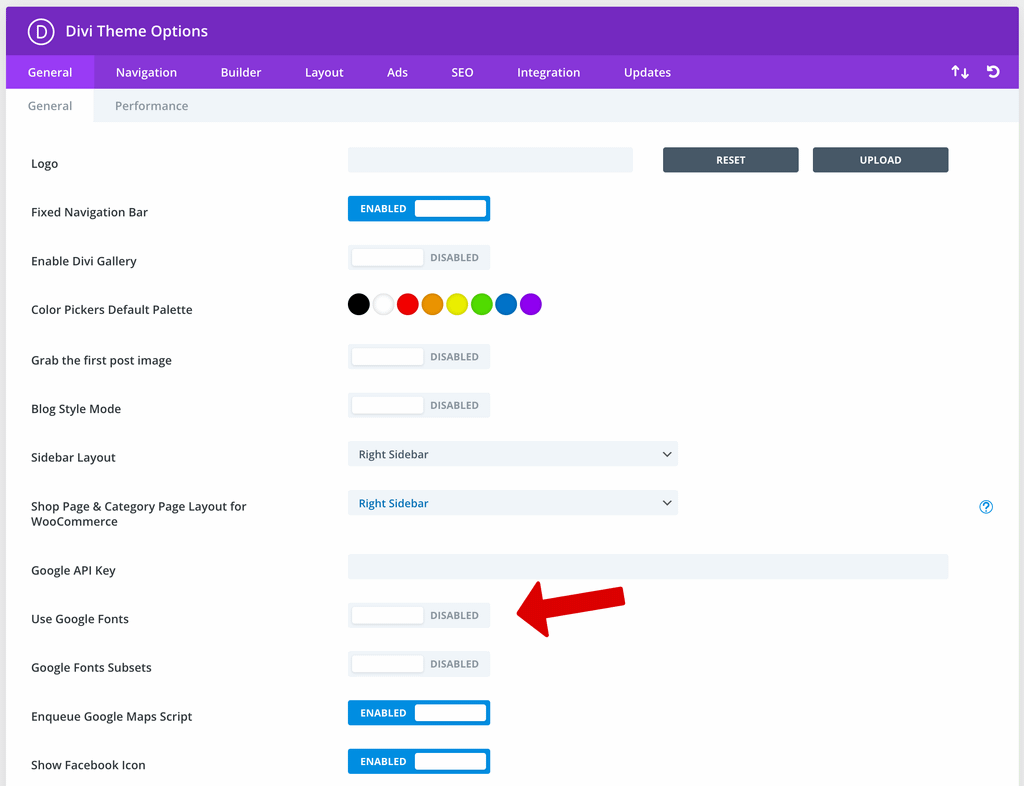
Disabling Google Fonts in the Divi Theme
The Divi theme has a few different ways it can load Google Fonts, but fortunately they can all be disabled easily.
Navigate to your wp-admin area
Hover the ‘Divi’ tab
Click the ‘Theme Options’ link
Change the ‘Use Google Fonts’ toggle to ‘Off’
Click ‘Save Settings’
Disabling Google Fonts Manually
If you are comfortable with adding custom code to your website, there is another way to disable Google Fonts.
The benefit of this second method is that you can disable the font requests individually, rather than all at once. This can be useful if you do want to keep some of the fonts.
First, view the source of your website and search for the code `fonts.google.com. You should find one or more lines that looks something like this:
Note that you need to remove the -css from the ID, otherwise this won’t work.
Conclusion
In this article we’ve looked at how to disable Google Fonts completely, or on an individual basis.
We hope you’ve found this useful. If you have, please consider sharing it on Facebook or Twitter.
How To Download Google Fonts
Google Fonts are free for both personal and commercial use. That means you can download and use them in your projects without having to ask permission or pay license fees.
Downloading the fonts is simple, you can either download them one at a time or all at once.
Downloading a Single Font
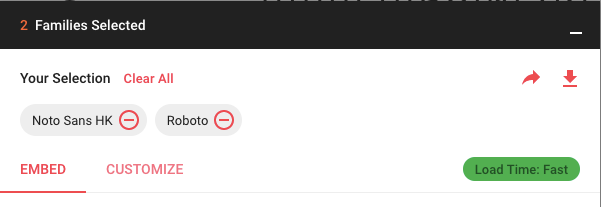
To download a single font, first, navigate to fonts.google.com and choose a font by clicking the red plus sign.
Clicking the black horizontal bar in the bottom of your screen will reveal more information about the font(s) you have selected:
In the top right you will see a red download icon, clicking that will generate and begin downloading a .zip file containing the fonts you have chosen.
Downloading All Google Fonts
A zip file containing every Google Font is available from the official repository.
Note: The .zip is over 300mb in size and will be even larger when uncompressed.
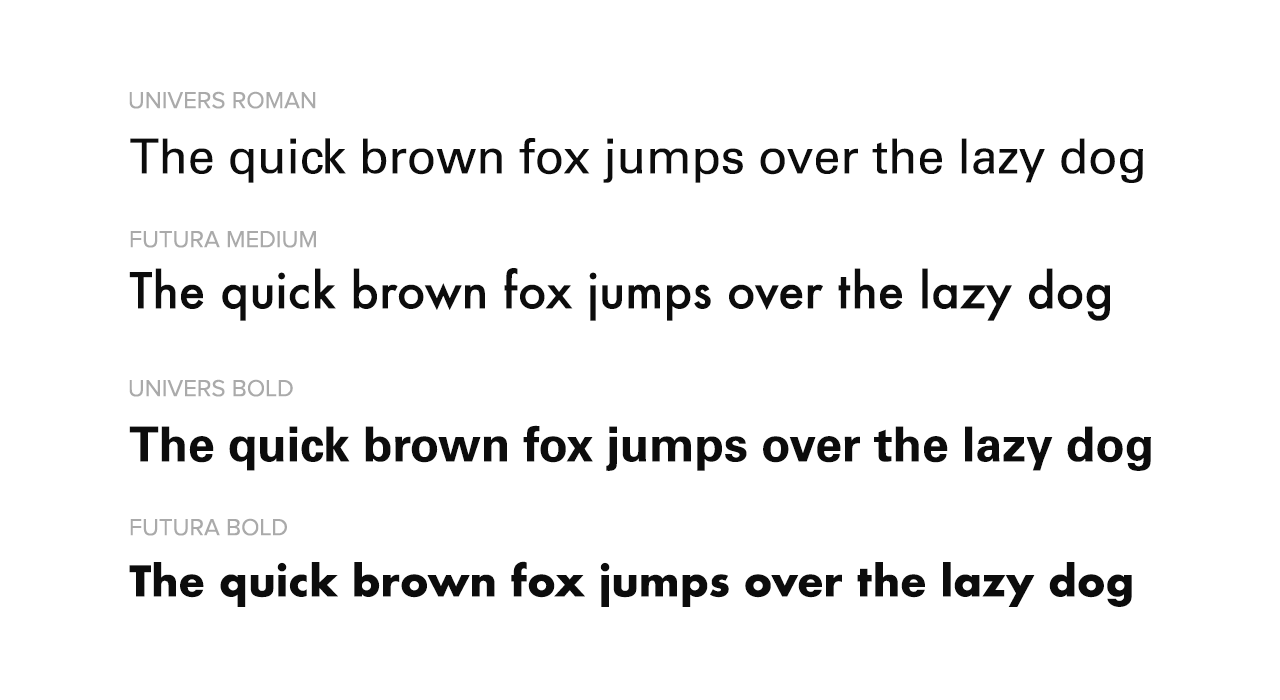
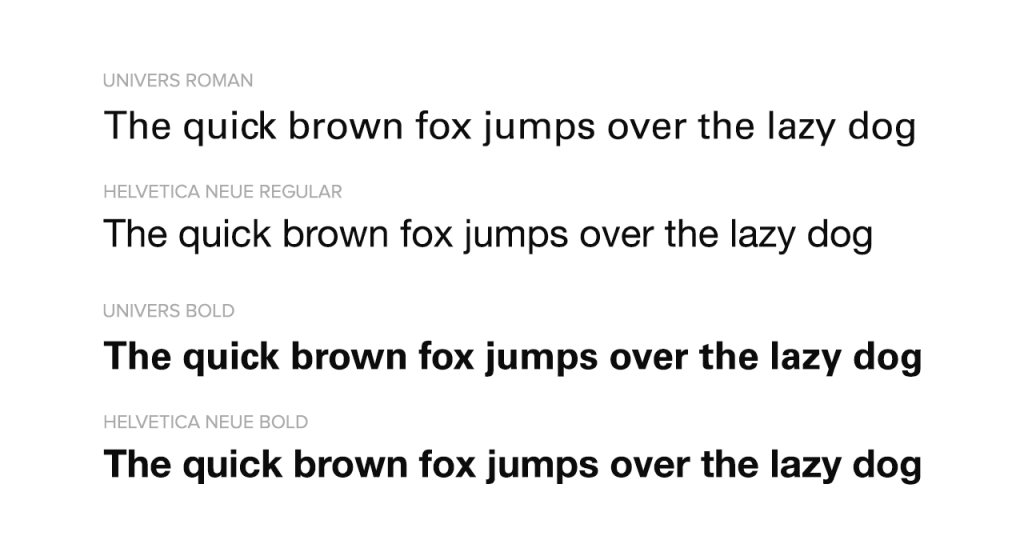
Google Fonts Similar to Univers
Released in 1957, Univers is a sans-serif font designed by Adrian Frutiger and released by his employer Deberny & Peignot. One of the most recognisable uses of Univers is the eBay logo.
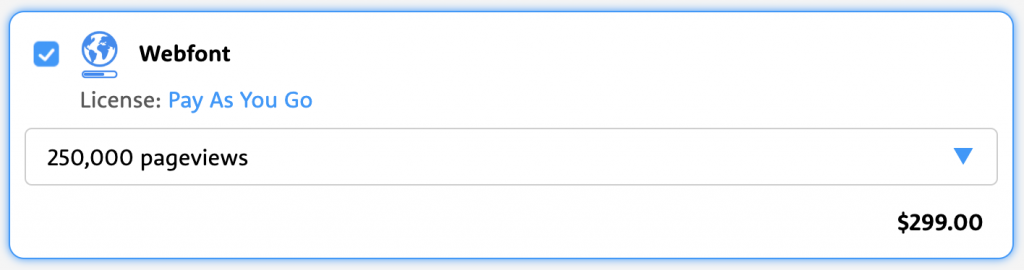
To use Univers on your website you will need a Webfont license. At $299 per 250,000 page views, it’s one of the more expensive fonts. Luckily we have found some similar fonts available from Google Fonts that are free to use.
https://www.myfonts.com/fonts/linotype/univers
Google Fonts Alternatives
Univers is an excellent font that has stood the test of time. Here are four fonts with a very similar aesthetic:
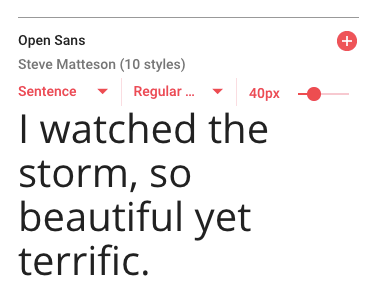
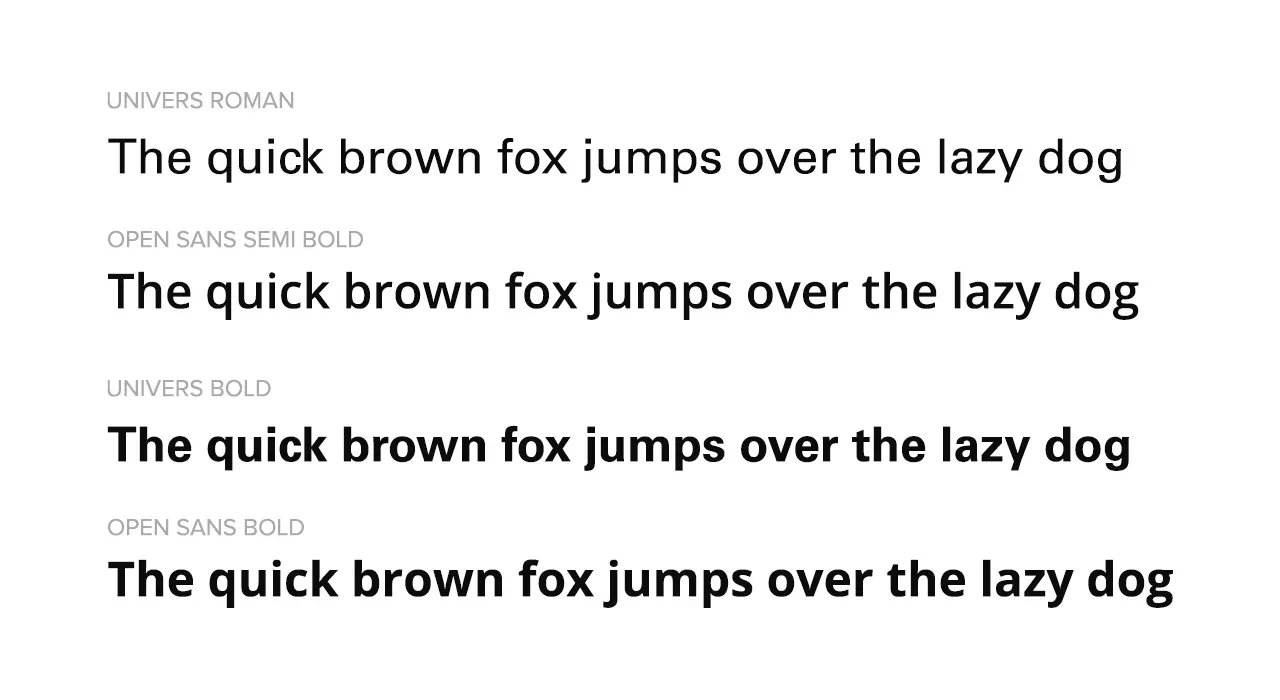
Open Sans
Open Sans Comparison
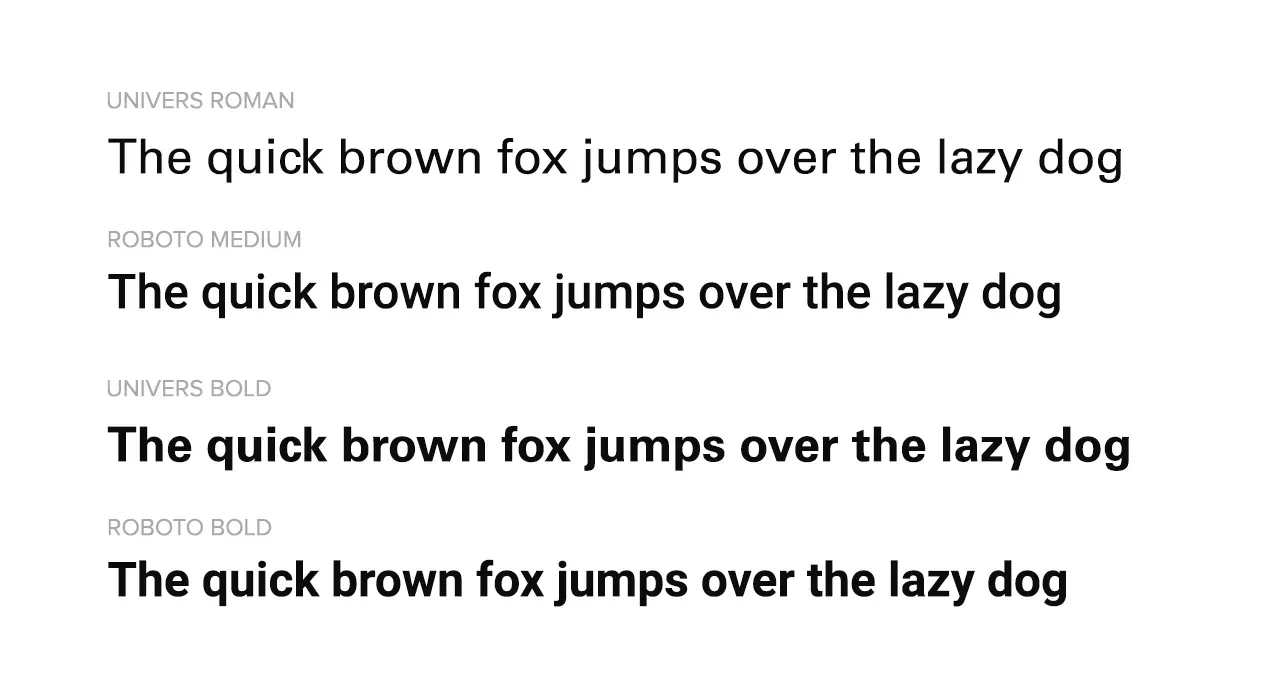
Roboto
Roboto Comparison
Other Alternatives
The next two suggestions are Web Safe Fonts, which means they don’t rely on the Google Fonts API and will generally load faster.
The simple answer is yes, all the fonts included in the Google Fonts library are released under licenses that allow you to use them for free, in both commercial and personal applications.
The open source fonts in the Google Fonts catalog are published under licenses that allow you to use them on any website, whether it’s commercial or personal.
All three licenses place very little restrictions on how you can use the fonts. The primary restrictions are based around redistribution.
A key requirement is that if you distribute the fonts, you must also include the original license files.
You must give any other recipients of the Work or Derivative Works a copy of this License; and
You must cause any modified files to carry prominent notices stating that You changed the files; and
You must retain, in the Source form of any Derivative Works that You distribute, all copyright, patent, trademark, and attribution notices from the Source form of the Work, excluding those notices that do not pertain to any part of the Derivative Works; and
It’s also important to not distribute modified versions using the original name:
The Original Version must retain its name, unmodified. Modified Versions which are Substantially Changed must be renamed to avoid use of the name of the Original Version or similar names entirely.
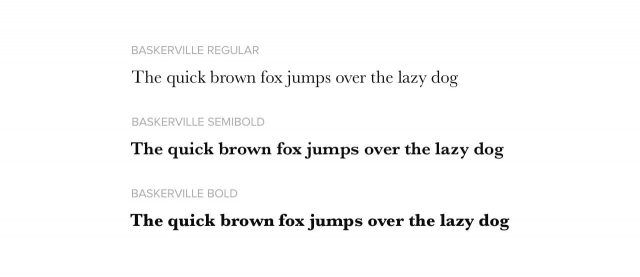
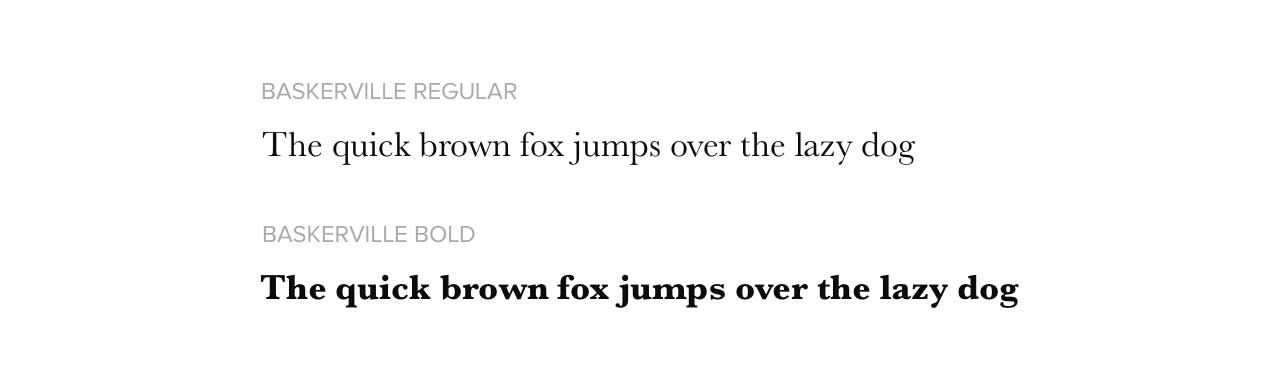
Baskerville is one of the oldest fonts we have covered, it was designed in the 1750s by John Baskerville. Variants of the font are still included in both Windows and macOS operating systems to this day and it’s considered to be a web-safe font.
Microsoft Windows
The variant included in Windows is named ‘Baskerville Old Face’ and was released in 1992 by designer Isaac Moore.
Baskerville Old Face
Apple macOS
macOS includes a font simply named ‘Baskerville’, this is a 1923 revival of the original Baskerville typeface by the Monotype Design Studio.
Baskerville
Kate Spade Logo
The Kate Space logo is designed using another variation of the original Baskerville typeface named ‘ITC New Baskerville Roman‘.
Kate Spade Logo
Using Baskerville on Your Website
Baskerville is not very popular on the web, that’s likely down to it’s very traditional aesthetic. A lot of websites that use a serif-typeface instead opt for the more modern-looking Georgia.
As it’s a web-safe font you can use it on your website by simply adding it to the CSS code:
body {
  font-family: Baskerville, Baskerville Old Face, Hoefler Text, Garamond, Times New Roman, serif;
}
Note: Due to the different naming conventions across operating systems, we have to include multiple fallback fonts.
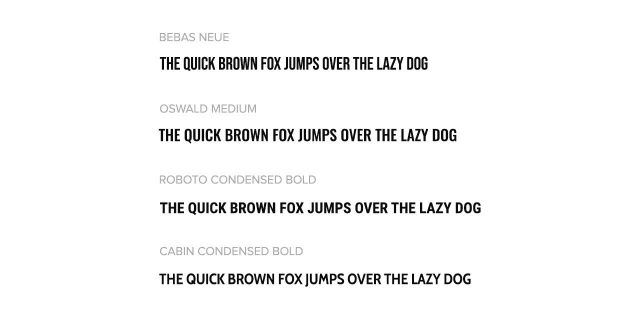
Google Fonts Similar to Bebas Neue
Bebas Neue is an open-source font designed by Ryoichi Tsunekawa and released under his company Dharma Type. It features a single weight (regular) and is an all-caps font.
Prior to Bebas Neue, Ryoichi released a font named ‘Bebas’. In 2010 Bebas was re-designed and released as Bebas Neue. Both the original and the Neue version were both released with a license that allows the fonts to be used for free, both in personal and commercial applications.
Bebas Neue is an extremely popular font and has been downloaded over ten million times. In 2019 Ryoichi released a premium version named ‘Bebas Neue Pro’ which includes lowercase characters and five new weights.
Bebas Neue Pro is an extremely high quality font which does not come cheap. A web license will set you back around $150 per 10,000 page views.
Google Fonts Alternatives
There is an active thread requesting the inclusion of Bebas Neue in the Google Fonts library that has support from Ryoichi himself. That may one day become a reality, until then here is three similar fonts we found.
Oswald Medium
Oswald Comparison
Roboto Condensed
Roboto Condensed Comparison
Cabin Condensed
Cabin Condensed Comparison
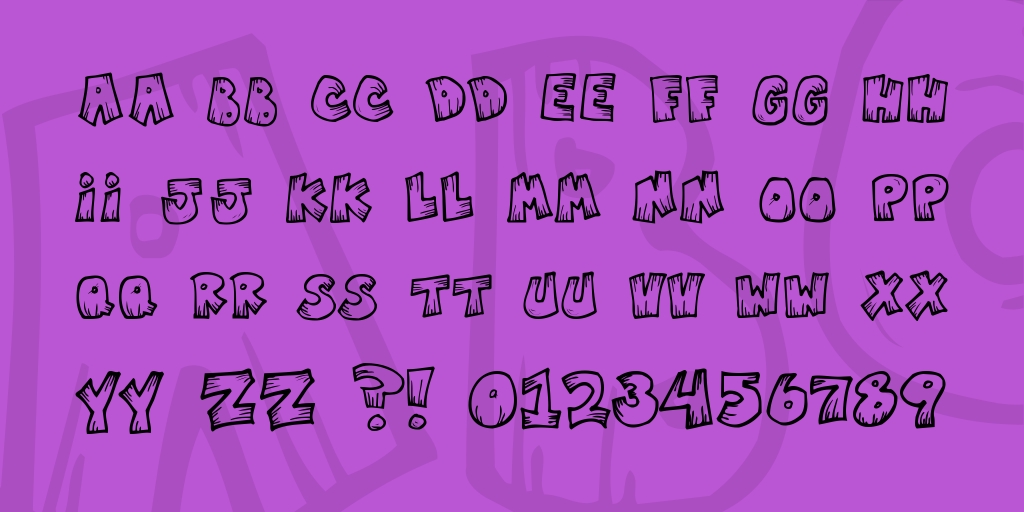
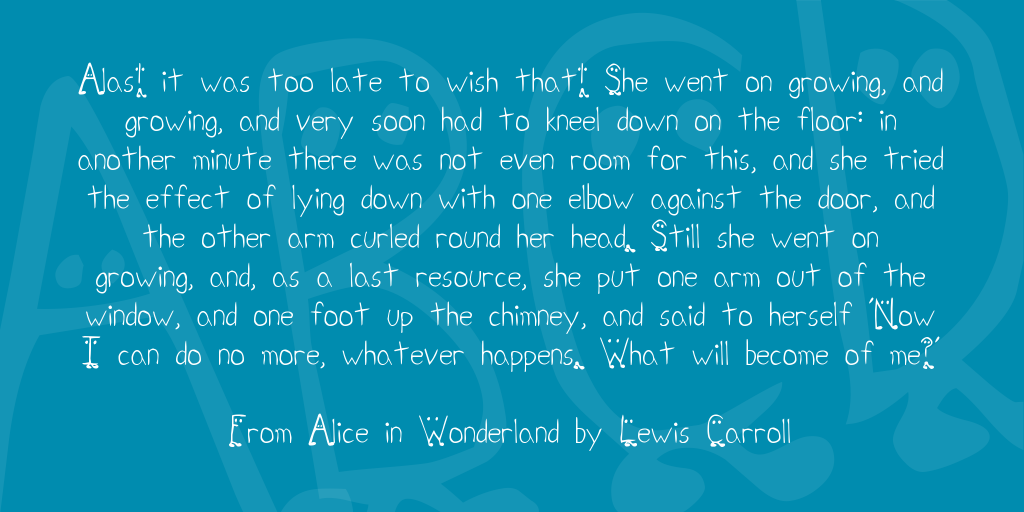
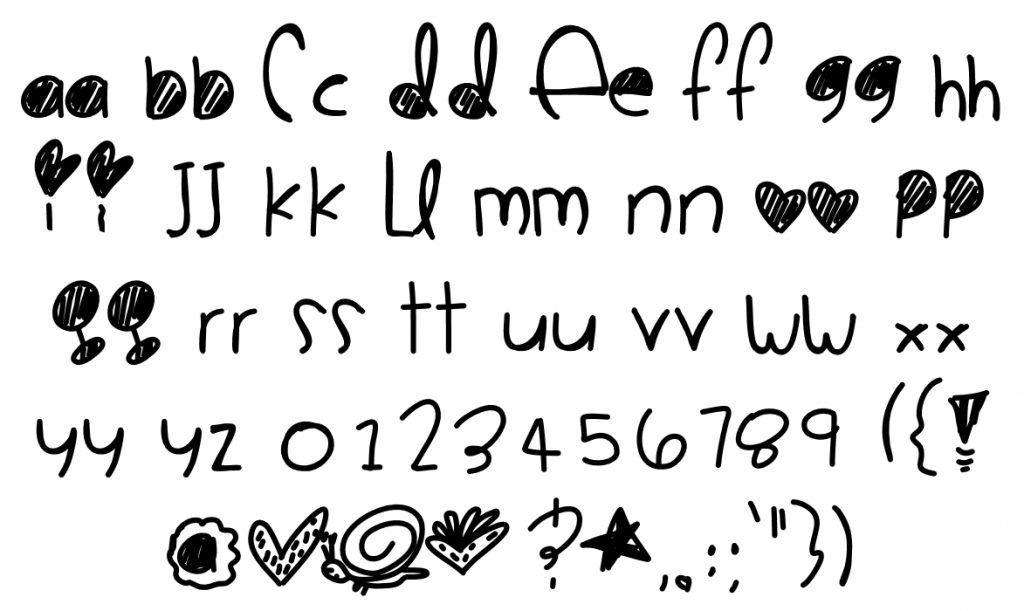
Top 10 Fun Fonts (Free & Premium)
Free Fun Fonts
When using freely available fonts it’s important to check the licensing terms. Almost every font is free to use for personal and non-profit use. However, only some are free for commercial use too.
The Supreme Logo features a distinctive bright red box with white italic text in the center.
The white text is set in the Futura Std Heavy Oblique typeface.
The design of the logo itself is very heavily inspired by Barbara Krugers work from 1987 in which takes a shot at consumerism.
Barbara Kruger 1987
The similarities with between the Supreme logo and Kruger’s work did not go unnoticed by the artist. In 2013 while commenting on Supreme’s lawsuit against another company she made this witty remark:
“I’m waiting for all them to sue me for copyright infringement.”