In this article, we’ll show you how to upload the font files you have on your computer, to use them on your WordPress website.
Table of Contents
Prerequisites
The font files need to be in one of the following formats: .woff, .woff2, .ttf or .otf. If the font files are contained in a .zip file, you will need to unzip them first.
If your files are not in the correct format, or you want to change them to a more optimized format like .woff2, you can use Font Squirrel’s Web Font Generator.
Where to Find Fonts
If you are looking for free fonts, the most popular sources are dafont.com, 1001freefonts.com and fontsquirrel.com
For premium options, look to creativemarket.com and creativefabrica.com
Licensing
Fonts usually have one of three license structures:
- Free for Personal usage
- Free for Personal and Commercial usage
- Payment required for Personal and Commercial usage
Font licenses can also vary depending on the intended use. For example, some fonts are free to use on your website, but you can’t use them in a product you create to sell. If you are using free fonts it’s important to ensure the license matches your intended use.
Using the Fonts in WordPress
To use the fonts in WordPress, we need to install Fonts Plugin.
First, login to your wp-admin area, navigate to Plugins → Add New, search ‘Fonts Plugin’ and install the plugin.
Next, click on Fonts Plugin → Upload Fonts in the admin sidebar.
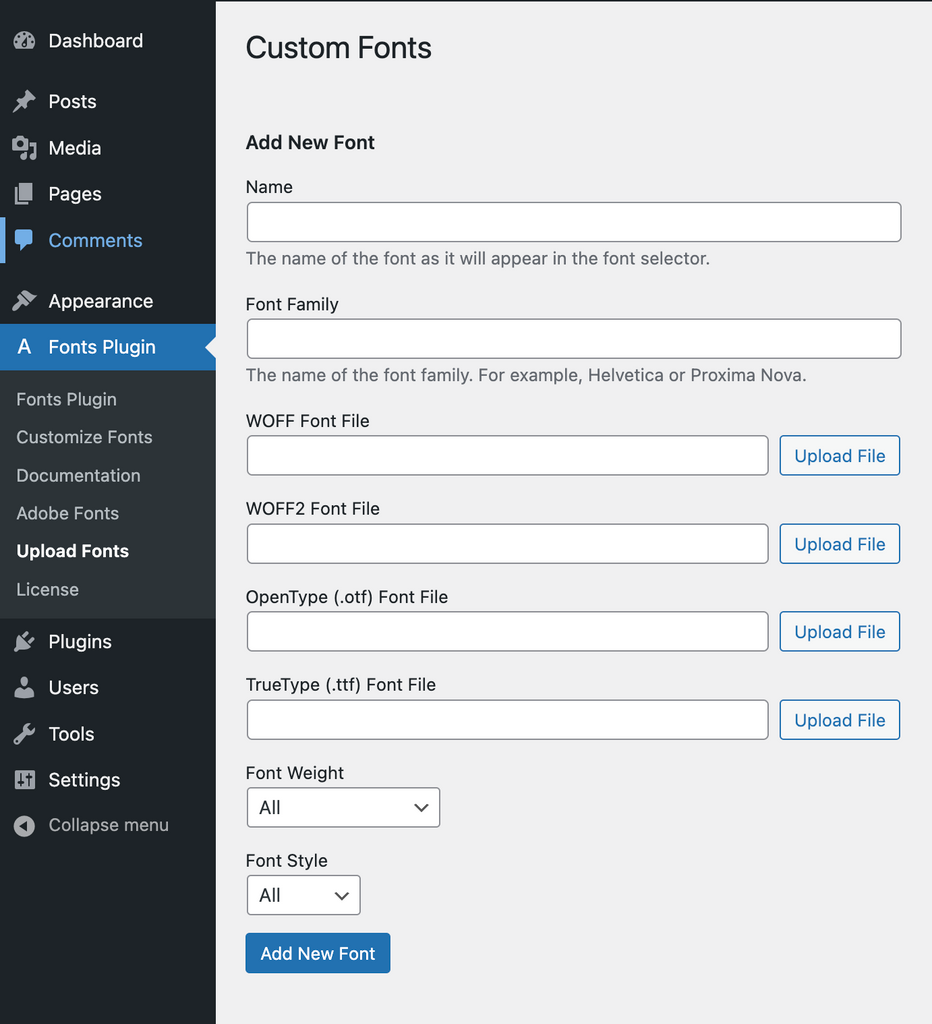
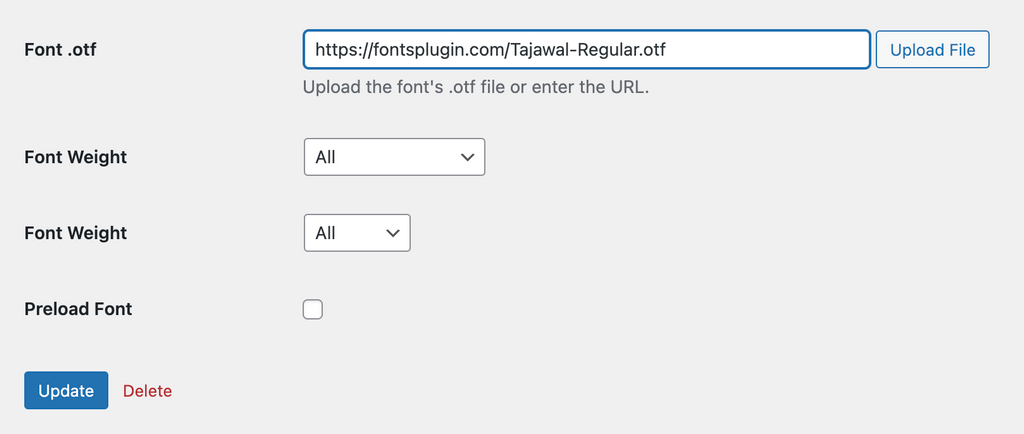
On the Upload Fonts screen you will be able to name and upload your font files.
For the font to display correctly you only need to upload one type of font file, we recommend the .woff2 format as it has the smallest file size.
If your font is split into multiple files, for example: OpenSans-Regular.woff2 and OpenSans-Bold.woff2 then you will need to enter a consistent Font Family value for each variant.
In this example we are adding the Regular variant of the Roboto font:
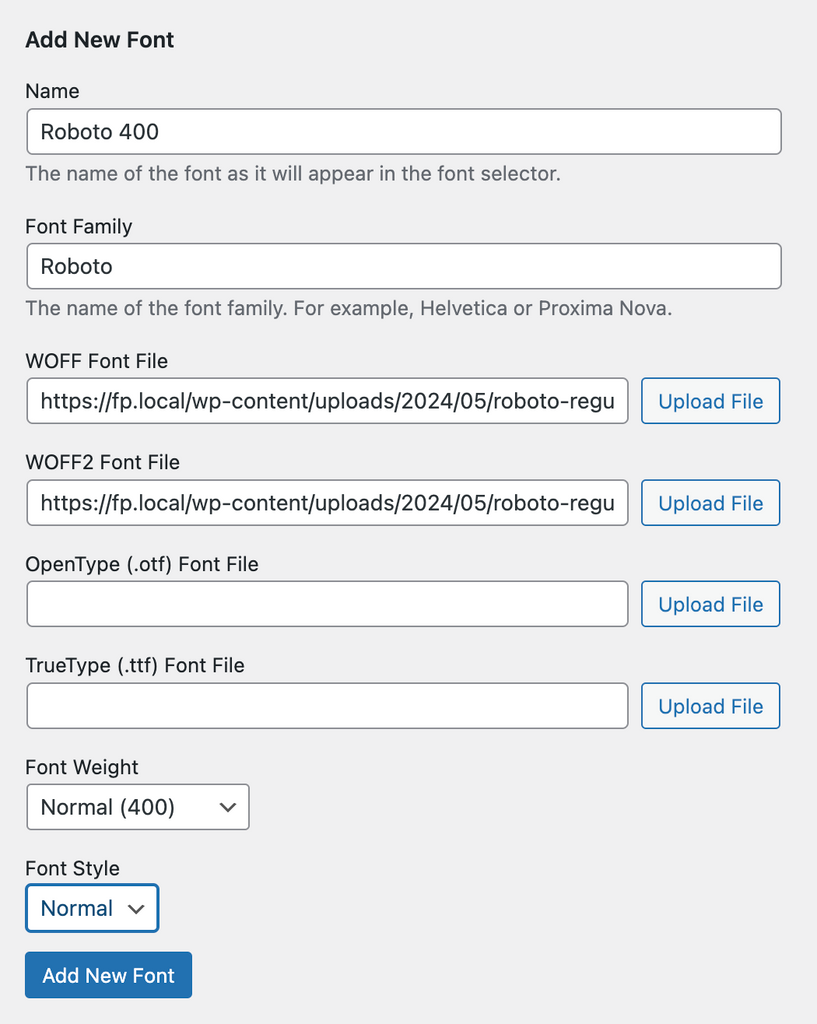
If the font you are adding only has one file, you don’t need to enter a Font Family value.
Once you have pressed the ‘Add New Font’ button, your font is now ready to use. It can be used in the Customizer, Block Editor (Gutenberg) or the Classic Editor
Customizer
The Customizer is used to configure the typography of your entire website at once.
From within wp-admin, navigate to Fonts Plugin → Customize Fonts → Basic Settings
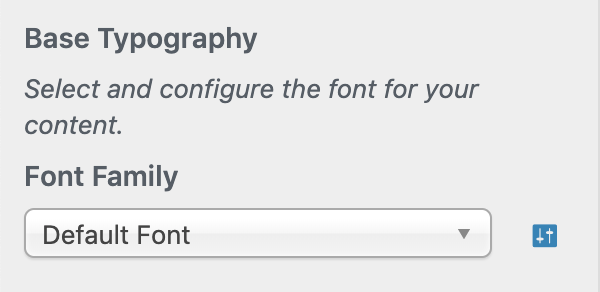
Choose your font from the dropdown list and the change will be reflected instantly. You can also change the typography of specific elements by exploring the ‘Advanced Settings’.
Clicking the blue icon to the right of the ‘Font Family’ control will reveal additional typography controls
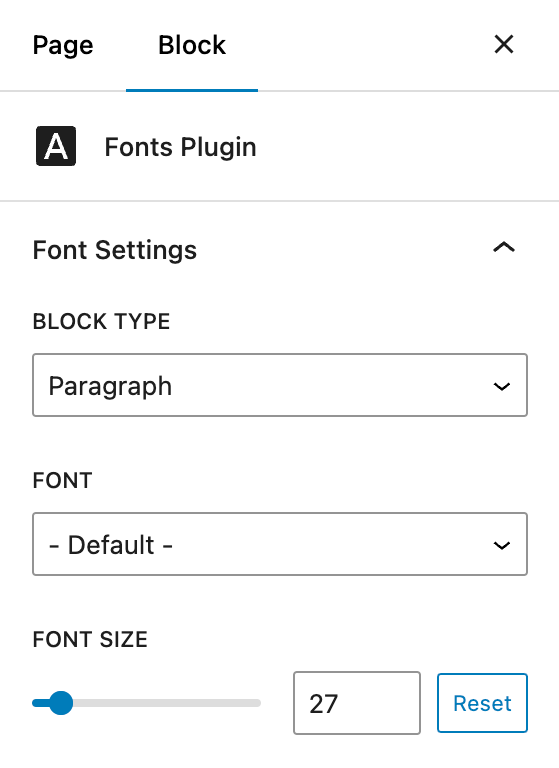
Block Editor
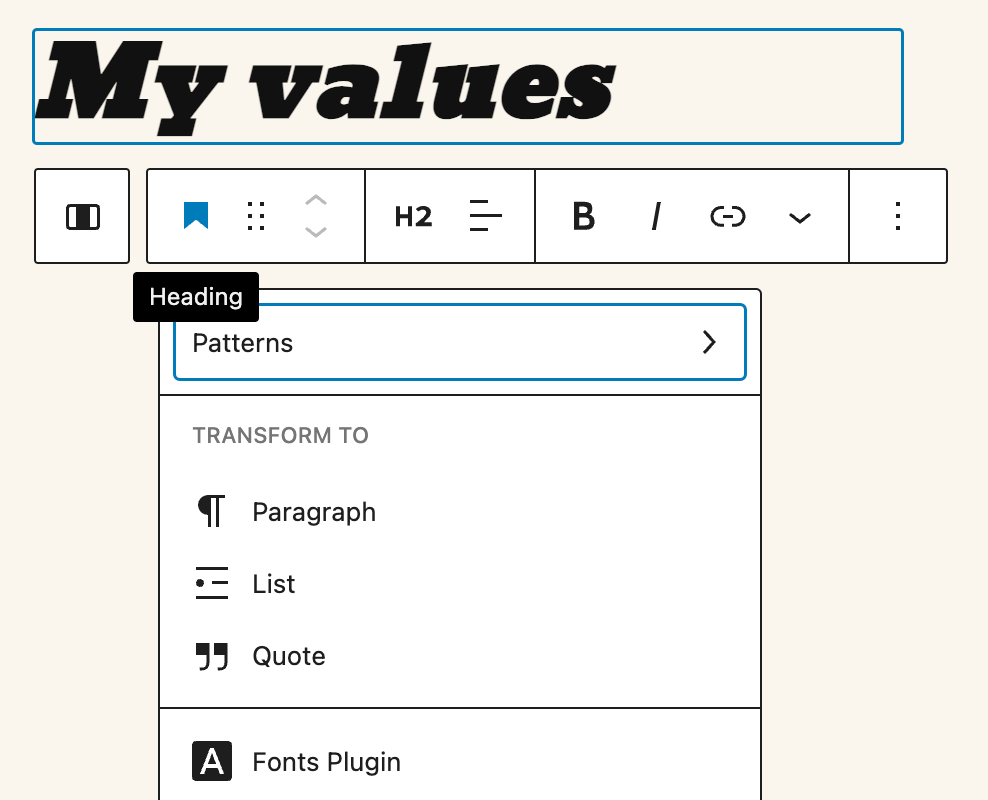
To use your new font on a single paragraph or heading in the block editor, first create your content.
Next, while focusing on the block, click the first icon (Transform). The editor will reveal a list of possible transformations. Choose ‘Fonts Plugin’.
Initially your content will look the same. However, you will now have access to the ‘Fonts Plugin’ sidebar where you can choose your new font:
Classic Editor
To use your new font in the classic editor, first create your content.
Next, highlight your content and click the Font Family dropdown. Your new font should be near the top of the list.

How to Optimize Custom Fonts
When fully optimized, uploaded fonts don’t add a large amount of weight to your page (30-50kb per variant) and shouldn’t noticeably slow down your website. Here are the best ways to do that:
1. Limit the Font Variants
There are 18 possible variants, as seen in the table below. Not all fonts support all 18, but if they do, it doesn’t necessarily mean you need to upload them all.
| Thin (100) | Thin Italic |
| Extra Light (200) | Extra Light Italic |
| Light (300) | Light Italic |
| Normal (400) | Normal Italic |
| Medium (500) | Medium Italic |
| Semi Bold (600) | Semi Bold Italic |
| Bold (700) | Bold Italic |
| Extra Bold (800) | Extra Bold Italic |
| Black (900) | Black Italic |
Only upload the variants that are used in your design and content. In many cases this may only be four: Normal, Normal Italic, Bold and Bold italic.
2. Preload the Fonts
Preloading is an optimization technique supported by all the major web browsers. It’s a line of code on your website that signals to the browser that your website uses a custom font and it needs to be download immediately to reduce the chance of a FOUT (Flash of Unstyled Text).
Preloading is a Fonts Plugin Pro feature and is automatically enabled for custom font uploads in the .woff and .woff2 formats. However you can also disable preloading for individual variants by unchecking the feature
3. Use Optimized Formats
The format of the font files can have a huge effect on the font size. Here is a comparison of Roboto (regular) in different formats:
- TTF – 168kb
- WOFF – 26kb
- WOFF2 – 19kb
All modern browsers support both WOFF and WOFF2 format, so we highly recommend using those. If your fonts are not already in either of those formats, you can use the Web Font Generator to convert them.
4. Local Hosting
Local hosting is when the font files are hosted and served from your own domain, and is the most efficient way to add fonts to your website. Using Fonts Plugin to add fonts to your website ensures your fonts are locally hosted automatically.